Raspberry Pi Enters the World of Microcontrollers
New embedded designers might not realize this, but Raspberry Pi is not known for building microcontroller boards. The renowned embedded hardware manufacturer is better known for single-board computers (SBCs) and computer-on-modules (COMs) for production-grade embedded applications. That all changed this week.
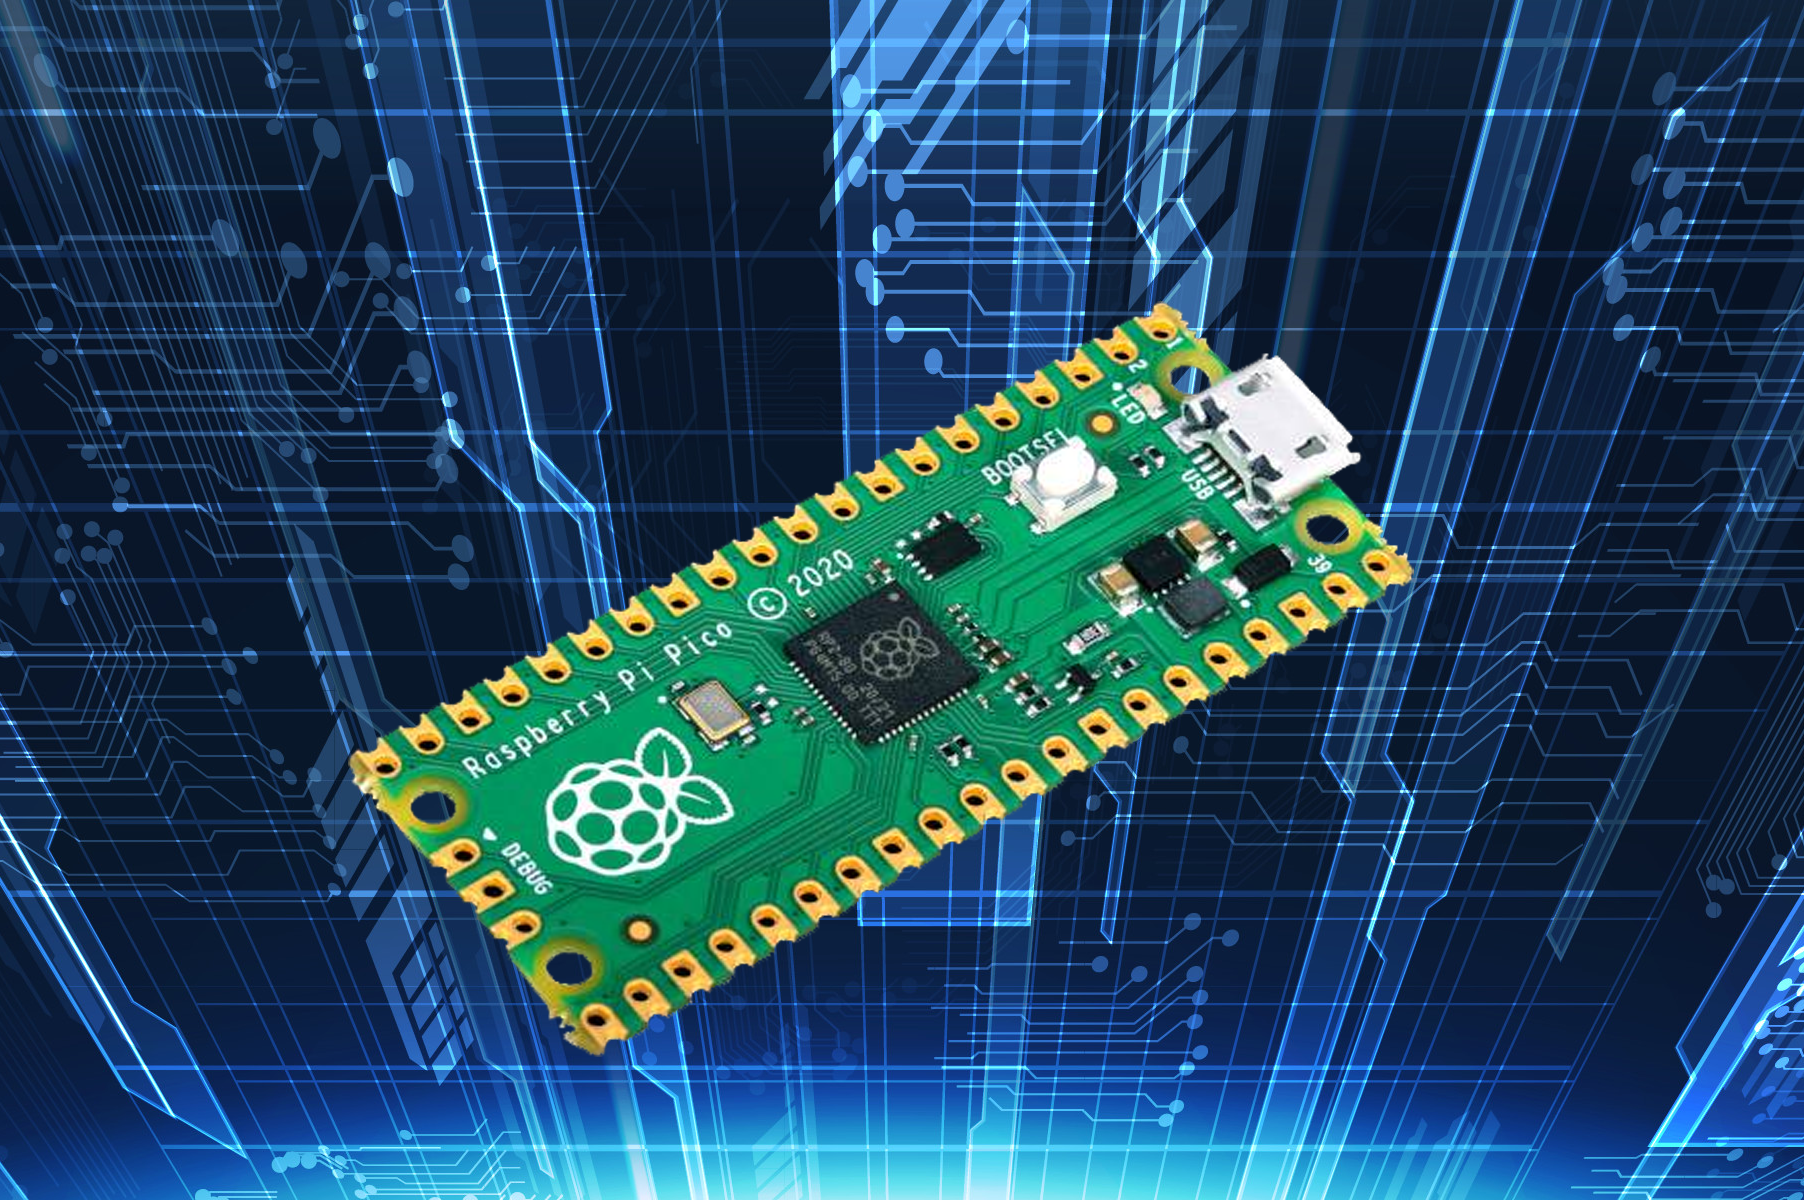
About 48 hours ago, the Raspberry Pi Foundation released its first microcontroller board, and we can officially welcome Raspberry Pi into the world of lightweight embedded design. Even better, the board is available at an excellent low price of only $4, yet it sports silicon IP that competes well with other popular MCUs you’ll find on the market. If you’ve been waiting for a Raspberry Pi microcontroller, the Pico may be your answer. Let’s dig into the specs and see how this Raspberry Pi microcontroller stacks up to other MCU boards.
Raspberry Pi Pico Microcontroller Specs
First and foremost, there is the MCU component itself. The Pico is designed around the RP2040 MCU, built on a Dual ARM Cortex-M0 core and manufactured at the 40 nm process node. This custom-developed MCU includes integrated programmable regulation, memory, clocking (running at 133 MHz), and plenty of IOs you’d expect on a Raspberry Pi microcontroller or other microcontroller board. Here are the primary specs for the RP2040:
- Programmable LDO for core voltage generation
- 264 KB on-chip SRAM
- Dedicated QSPI bus for up to 16MB external Flash memory
- Core clock and USB signals generated with 2 internal PLLs
- 30 GPIO pins, including 4 ADCs
- 2x UART/2x SPI/2x I2C
- USB 1.1 controller and integrated PHY
- 8 PIO state machines
Looking through the list of specs, we don’t see some of the same integrated features you might find in other popular MCU product lines, but the RP2040 has the features you’d need to start developing production-grade embedded applications. There is also the onboard USB-C connector and integrated PHY for connecting to your PC for flashing. It’s a simple design, yet it’s very versatile with a small footprint.
One downside is the lack of Bluetooth, Wifi, or Ethernet on the Pico module. To get these capabilities, you’ll need to connect an external hat board with an integrated transceiver (and an RJ45 connector for Ethernet). The other option is to take advantage of the castellated holes along the board edge and use these to mount the Pico onto a carrier board (more on this below).
Programming Support
The RP2040 can be programmed using MicroPython, CircuitPython, or C/C++. For production-grade applications requiring a potentially IPC Class 2 solution, MicroPython is the more useful as implements most of the core Python 3 language, although without all the standard Python libraries. However, you can still build a range of applications with MicroPython using open-source packages and libraries. Some application areas for the Pico include:
- Small robots or electromechanical systems
- Light industrial automation
- Environmental or motion sensor boards
Another point that sets the RP2040 MCU apart from other components is the Flash memory is off-chip. Some MCUs will give you the option of booting from external Flash memory via SPI, but they will still dedicate some space on-chip for flashing. The off-chip Flash is sufficient for large applications with fast booting over QSPI for professional applications. As new iterations of the Pico module and RP2040 MCU are released, expect more powerful variants of this module with additional on-die features.
Standalone Board or Mountable Module?
In my opinion, what makes the Raspberry Pi Pico interesting is its surface-mountable nature thanks to the castellated holes along the board edge. The back side has no components or exposed copper except for 6 test points, so the Pico could be mounted to a carrier board on SMD pads.
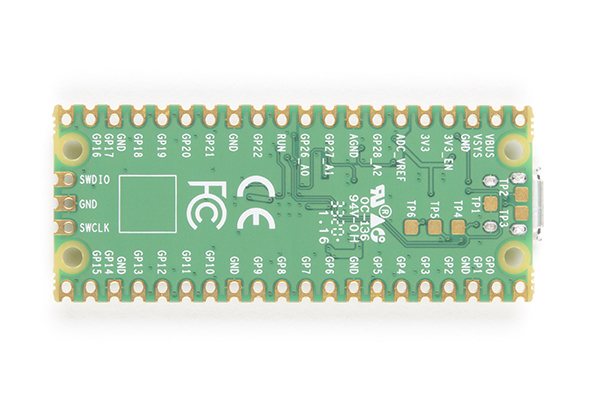
You can design a carrier board and solder the Pico directly to the carrier along the hole edge, just like you would for other SMD modules. However, there is also a standard pin header connection along the back edge of the holes. If you want much higher reliability, you can put pin headers on the Pico and create a through-hole connection onto the carrier board.
What’s nice about this feature is that it gives you the option to use either mounting/connection style. With the Pico, you could use the pin header connection for prototyping and immediately use the castellated holes to attach the same Pico module to a carrier board. Other MCU boards with castellated holes don’t give you this option. There are also mounting holes in all four corners of the Pico board, so it can be used with standoffs or mounted directly to an enclosure.
If you're interested in working with castellated holes, watch this video from Altium Academy:
With the CAD tools in Altium Designer®, you can easily create a footprint with solder pads for the castellated holes on the Raspberry Pi Pico. This makes it easy to include a Raspberry Pi microcontroller or other castellated module in your PCB layout. You’ll also be able to quickly prepare your boards for manufacturing and assembly.
Once you’ve created your board, you can share your design data on the Altium 365® platform, giving you an easy way to work with a remote team and place your board into manufacturing. We have only scratched the surface of what is possible to do with Altium Designer on Altium 365. You can check the product page for a more in-depth feature description or one of the On-Demand Webinars.